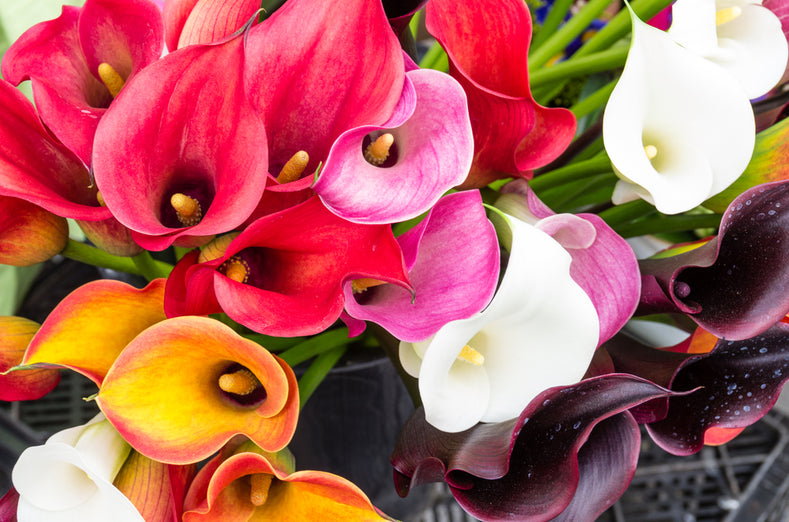
Calla lilies make a stunning addition to any environment. They exude elegance and have remarkable longevity. They come in a wide array of colours, catering to various tastes and themes: from vibrant yellow to deep eggplant purple, delicate blush pink to luxurious velvet hues, vibrant sunset orange to intense blood red – and, naturally, the timeless favourite, pure white, often found in bridal bouquets. Surprisingly, cultivating calla lilies from bulbs is a straightforward process, and by adhering to a few uncomplicated steps, you can enjoy a profusion of their unique blossoms year after year.

Like with any plant, the quality of the bulb directly impacts the outcome. Smaller, ageing bulbs or rhizomes will produce disappointing, inferior flowers, whereas the substantial, recently harvested bulbs provided by DutchGrown will ensure a larger plant with an abundance of high-quality blossoms.
When is the best time to plant Calla Lilies?
Planting calla lilies is best done in the spring, once the risk of frost has subsided.
What is the preferred sunlight for Calla Lilies?
In warmer regions, calla lilies thrive in both full sun and partial shade. However, in cooler climates, they flourish best in full sun.
Where to Plant Calla Lily Bulbs?
Calla lilies exhibit remarkable versatility, flourishing in garden beds and borders, while also serving as an excellent choice for planters and containers.
When planting them in beds or borders, it's essential to consider that certain varieties can reach heights of up to two feet. Therefore, it's advisable to position them towards the rear or in the middle of the planting area. It's worth noting that their distinctively speckled foliage remains visually appealing throughout the entire season, even after the flowering period has concluded.
When opting for pots or containers, calla lilies generally thrive when planted on their own. This doesn't necessarily mean you can't pair them with other annuals, but for optimal results, it's safe to say that calla lilies prefer to have their own space.
For those fortunate enough to have a cutting garden, calla lilies should undoubtedly occupy a place of honour. Renowned for their enduring vase life – lasting up to an impressive two weeks – they are also prolific in producing blooms throughout the season. It's no surprise that calla lilies remain a cherished favourite among florists.

How to Plant Calla Lilies
To successfully plant calla lilies, follow these steps:
- Dig a hole that's approximately 10 cm deep. (As a general guideline for planting bulbs, provide at least twice their height in soil above them.) Carefully place the bulb into the hole with the growing tips, also known as 'eyes,' facing upwards.
- In garden beds, maintain a spacing of about 15 cm between each bulb. If you're planting in containers, you can place them a bit closer together, roughly 10 cm apart.
- After planting, thoroughly water the area to help the soil settle around the bulbs. Initially, when the bulbs are freshly planted, it's essential to water sparingly. As the plants develop a few leaves, you can gradually increase the amount of water you provide.
- Be patient after planting; it may take around 2 weeks or more for the initial calla shoots to emerge. Once they do, the plants typically grow rapidly.
- Calla lily bulbs typically bloom in the summer. After the flowers have faded, allow the plant to go through a resting phase. During this period, there's no need for extensive watering.
If you wish to attempt preserving your calla lilies for the following year, follow these instructions:
- Fertilise regularly throughout the growing season. As soon as the blossoms fade, promptly remove the flower stems. This prevents the plants from producing seeds and conserves energy for the next year's flowers. Continue fertilising until the foliage starts to turn yellow.
- Once the leaves have withered away, dig up the bulbs and trim off any remaining foliage, leaving about an inch or two of stem attached. Allow the bulbs to cure in a warm, dry location for several days.
- Subsequently, place them in a box containing slightly damp peat moss. Store the box in a dark area. Periodically check during the winter to ensure the bulbs are neither excessively moist (which can lead to rot) nor overly dry (causing them to shrivel).
- Replant the bulbs in the spring when the next growing season begins.


